Covering a scaffolding in a heat shrinkable plastic film to provide weather protection or environmental containment is generally known as scaffold shrink wrapping or just scaffold wrapping. How is shrink wrap different to traditional scaffold sheeting?

Our step by step guide is designed as an introduction to the scaffold wrap process. This guide is based on the practical experiences of our own installation teams over many years. Scaffold shrink wrapping may involve working at height and the use of a propane gas heat tool and before you start work you should always ensure that you have the correct training.
In addition, only attempt scaffold wrapping when the weather conditions are suitable. You should avoid shrink wapping scaffolding in wind speeds over 20mph, or when conditions are wet. Additional information on how to shrink wrap temporary roofs can be found here.
For best results, scaffold structure should be flush. Shrink wrap can be cut around protrusions but it can slow the installation process and adversely affect performance and appearance. You can find out more about setting up a scaffold structure in this article; 'How To Set Up a Scaffolding Structure for Shrink Wrapping'
Select the shrink wrap film. The most common shrink wrap roll size for wrapping scaffolds is a 7 metres wide x 15 metres long roll. Although it is quite possible to purchase shrink wrap films that open out to a 12 metre width, these rolls are not popular for scaffold wrapping because;
As standard, shrink wrap sheeting for scaffolding is flame retardant. There are two flame retardant standards which apply to scaffold shrink wrapping in the UK. The most basic is EN13501 which is the European standard and called up by building regulations. Some sites however call for the more advanced LPS certification. LPS1207 refers to scaffold sheeting and 1215 refers to internal sheeting.
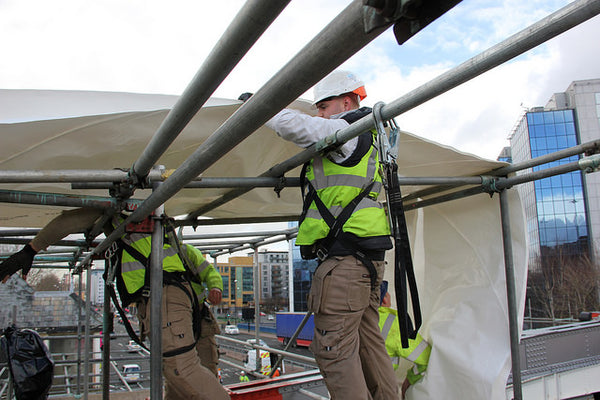
Make sure the scaffolding is ready to work on. This means that it is complete with fully boarded lifts and handrails in all areas that will require sheeting. Do not work on a scaffolding that has not been signed off and ‘tagged’ as safe to work on.
Determine the best orientation for the sheet.
The shrink wrap sheet is secured to the scaffolding structure by wrapping around a horizontal tube (ledger) and then heat welding it to itself. For external shrink wrap sheeting maximum untied vertical distance for scaffold shrink wrap = 3 lifts / 6m.

A sheet can be terminated in a number of ways. Most common is to wrap the shrink wrap around a handrail, clip into position, and weld back on to itself. This weld should be around Weld Shrin k Overlap shrink wrap around scaffolding tube by 30-40cm and use clip to hold before heat welding.
The welding is a critical part of the scaffold shrink wrapping process because this is what is holding the shrink wrap on to the scaffolding. A poor quality shrink wrap film may initially look as though it has welded properly but the weld may slowly peel apart in the hours and days following installation. Taping along the weld may help but this can additional time and cost and if you are using a good quality shrink wrap film, once it is heat welded, it should not be possible to pull the weld apart, and no additional taping should be necessary.
An alternative to finish the shrink wrapping at a horizontal tube is to batten the shrink wrap to the inside of the toe board. This is most often used when creating full environmental containment.
Take care not to drop rolls or snag sheets of shrink wrap on scaffold fittings during installation
The propane gas gun bonds overlapped areas of shrink wrap together
Vertical joins - Vertical joins between sheets of shrink wrap film are simply created by overlapping sections of film by at least 300mm and then using the propane gas gun to create a welded joint between the two sheets.
You can watch a video which shows the process for creating a vertical join between sheets below;
Horizontal joins - The method for creating a horizontal join between sheets of scaffold wrap is to wrap the shrink wrap around a double tube. Often a double handrail is used for this purpose. The top sheet is wrapped around the lowest of the two tubes, (making a vertical cut at each standard) clipped and heat welded into position. The bottom sheet is pulled up behind the lowest tube, wrapped around the highest handrail, clipped and heat welded into position. Installing the sheets in this way means that the sheets sit behind each other like roof tiles.
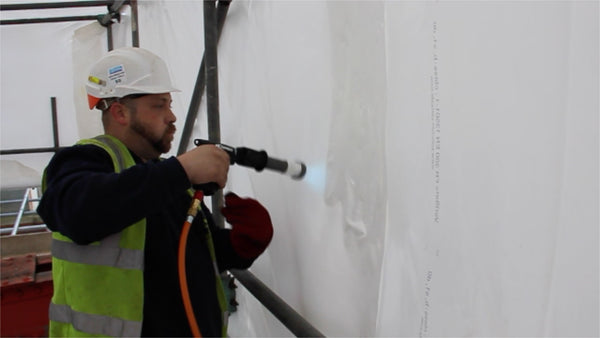
The heat gun is used to shrink the scaffold wrap ‘drum tight’ Hold the gun 30-40cm from the shrink wrap and work the heat over the shrink wrap – like spray painting.
There is no specific pattern for heat shrinking, some people like to move the gun in an ‘up and down’ pattern, others from side to side - it does not matter so long as you shrink in a consistent way and completely finish one area before moving on to the next. Repeatedly going back over an area of scaffolding shrink wrap that has been heat shrunk will eventually start to make the shrink wrap go thin and eventually will even create a hole.
It is the heat shrinking process that light winds are most critical. During the heat shrinking process, the plastic will become soft and flexible. As the shrink wrap cools, it shrinks and once shrunk tight is extremely resistant to wind damage. Note - poor quality films may have a tendency to sag in the days following installation.
You can watch a video of the heat shrink process below;
Even the most experienced shrink wrapper will make an occasional hole in the shrink wrap film during the welding or heat shrinking process. Small holes (less than 6-7cm diameter) can be quickly repaired almost invisibly using shrink wrapping tape. For best results, tape a hole whilst the shrink wrap film is still warm as this will ensure the adhesive works rapidly. If a hole is larger than the width of the shrink wrapping tape then it can be repaired by cutting a patch of shrink wrap and heat welding into position over the hole. Make sure that the patch of shrink wrap us sufficient to cover the hole with an overlap around the hole of 30cm. For a neat finish to the patch, tape around the perimeter.
Like to find out more?
Shrink wrap is also used to shrink wrap temporary roofs - find out more here
For a guide to shrink wrapping materials and equipment click here