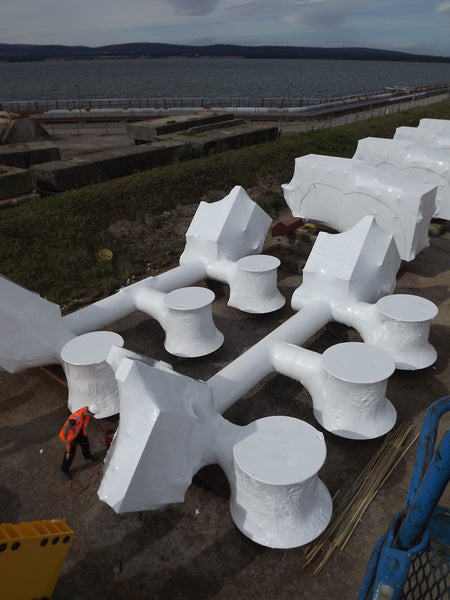
Although at Rhino Shrink Wrap we specialise in supplying (and installing) shrink wrap for the encapsulation of scaffolding, our industrial grade shrink wrap sheeting is also used for creating transport covers which protect large products against weather damage during transport by road or during storage outdoors.
Read on for tips and tricks to create robust & professional looking shrink wrap transport covers which enable your product to reach your customers protected and looking great.
Consider the purpose of the industrial cover. Is it for weather protection or impact protection? Is it for transport or outdoor storage? Whilst shrink wrap is excellent for providing 'environmental protection' against rainwater and dust ingress, it will not provide any significant degree of impact protection so any padding or protection will need applying before the shrink wrap.
Then, measure up the object to be shrink wrapped - ideally you want to use a shrink wrap sheet that will cover the entire product with as few joins as possible. This is where a wider and longer roll of shrink foil, such as those in a 12 metre width x 25m length sheet make the shrinkwrap covering process much faster and easier.
You may be able to use a slightly thinner grade of shrink wrap film for transport covers than scaffold wrapping, but we would not recommend using a shrink-wrap film thinner than 190 microns. As with scaffold wrapping the quality of the shrink wrap film is vital. The following are the areas you need to consider;
Heat welding: Poor quality shrink wrap films can sometimes appear to be heat welded by may slowly seperate over a period of time. Once a weld / join between two sections of shrinkwrap comes apart, the integrity of the whole covering will be affected. The heat weld process is shown in the video clip below.
Ultra violet inhibitor (UVI): In addition, if the cover is to be used to protect a product stored outdoors, make sure you are using a shrink wrap with sufficient Ultra Violet Inhibitor (UVI). Your supplier should be able to advise you how long a shrink wrap film will last depending on where in the world it will be used.
Shrink ratio: Make sure the shrink wrap film you are using has a balanced shrink ratio. This means it should shrink evenly and equally. Some shrink wrap films may only shrink in one direction which can create a shrink wrap cover that is slack and wrinkled and impossible to fix no matter how much you heat it.
Flame retardancy: Many cheap shrink wrap films contain little or no flame retardant additive whilst often the product being covered is worth millions. Aways use a flame retardant film and ask to see a copy of the certification. If there was a fire, your insurance company may want to see proof of what you are using.
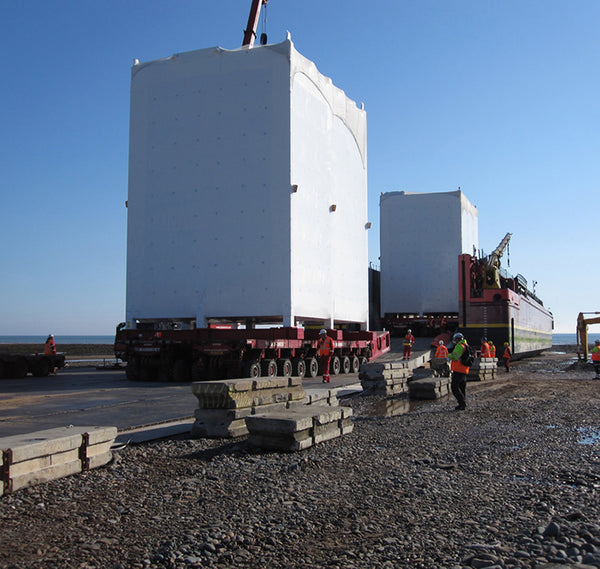
To create an effective shrink wrap transport cover you will need to be able to access all parts of the cover for heat welding and heat shrinking. For square objects such as a modular building a small 'scissor lift' may be sufficient but for shrink wrapping large boats and other awkwardly shaped objects a 'cherry picker' may be better. You may find a heat gun with an 'extension' is useful for heat shrinking those 'hard to reach' areas.
For creating a shrink wrap transport cover you have two main approaches. One of the best ways, if possible, is to lift the object to be covered off the ground, and slide a sheet of shrink wrap underneath. This shrink wrap 'footprint' can be trimmed & temporarily held against the sides of the product with patch tape. A seperate sheet of shrink wrap is then pulled over the object being covered and heat welded to the bottom sheet. This technique is often used for the shrink wrapping of modular buildings and works well as it needs no other materials than the shrink-wrap sheet itself.
However, sometimes the object being covered cannot be lifted. In this case some way must be found to anchor the shrink wrap sheet around the bottom of the object so that when the sheet is heat shrunk with the hand held hot air gun it shrinks and molds tightly around the product being covered. Generally the preferred method is to pass a 'band' of strapping or webbing around the bottom of the product at the point you wish the shrink wrap cover to finish. This band needs to be tensioned, so for large industrial products, a ratchet strap can work well. When shrink wrapping boats a 'perimeter band' of woven strapping is used.
Finally, for some products you can batten the shrink wrap around the bottom of the product but this can be time consuming if the batten needs to be drilled into steel. In addition, the batten may be tricky to remove when the object reaches it's final destination and the shrink wrap cover is removed.
Prior to shrink wrapping, don't forget to pad any sharp edges that may create a hole in the shrink wrap during heat shrinking. As with all shrink-wrap sheeting operations only carry out sheeting work in light winds and generally dry conditions or the appearance and performance of the finished job will be affected.
With the roll of shrink wrap mounted on a roll stand at gound level, pull the shrink wrap sheeting up and over the object to be covered and drop it to ground or position of the perimeter band. The shrink wrap can then be cut from the roll and unfolded.
After trimming any excess shrink wrap sheeting, the film is then heat welded to the footprint or folded around the perimeter band (refer to step 3 above) and heat welded back on to itself.
Finally the entire shrink wrap cover is heat shrunk 'drum tight'.

If you are planning to shrink wrap a large product for long term outside storage you should consider how you you might deal with condensation beneath the shrink wrap cover.
There are generally two approaches to this problem. The first approach is used when the shrink wrap is completely encapsulated and sealed around the object. In this case large sacks of 'dessicant' can be placed inside the cover and they will gradually absorb moisture over time.
The second approach is to fit an air vent to the shrink wrap cover that allows air to flow under and through the cover.
Once the shrink wrap cover has been fitted and heat shrunk you may wish to install a zipped access door in the cover. Some customers like a zipped access door as it can allow access within the factory for any last minute problems and it can allow access during transport by customs officials who may simply cut their way through the cover if they cannit gain an easier entrance.
However, other customers prefer the object to be shrink wrapped with no access. If a zipped access door is required then these are generaly available as a 1 metre high 'hatch' or a 2m high door. They consist of a 'U' shaped zipper sewn into a rectangle of polythene. The door is taped into the required position and then unzipped and the shrink wrap underneath cut away to create an opening.